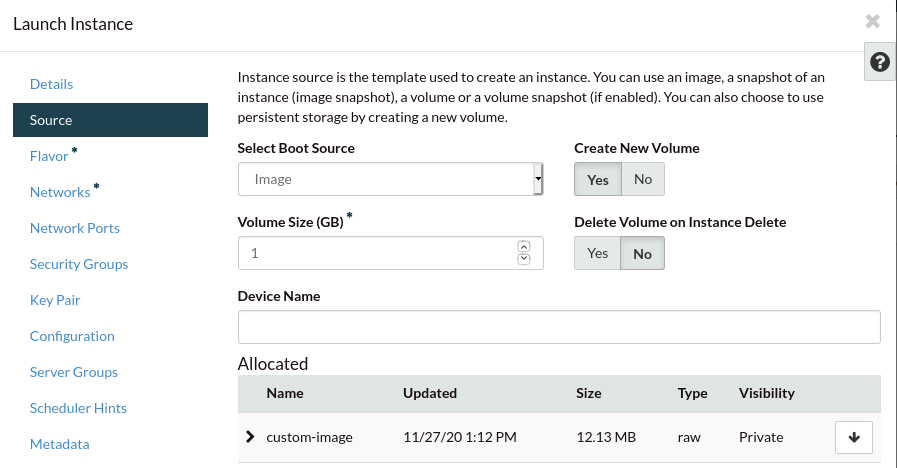
Launching an instance from a custom image
On the dashboard you will find the image you uploaded under the Images
section. From here, you can either click on the Launch button next to
your Image, or go to the Instances section and create a new instance.
Regardless of the method you use, once you reach the “Source” section of
instance creation select “Boot from image (creates a new volume).”
as the boot source. Then find your custom image from the list below
(if you clicked launch straight from the image menu it should already be
selected.) Also ensure the volume size is at least the same size as the image
uploaded:
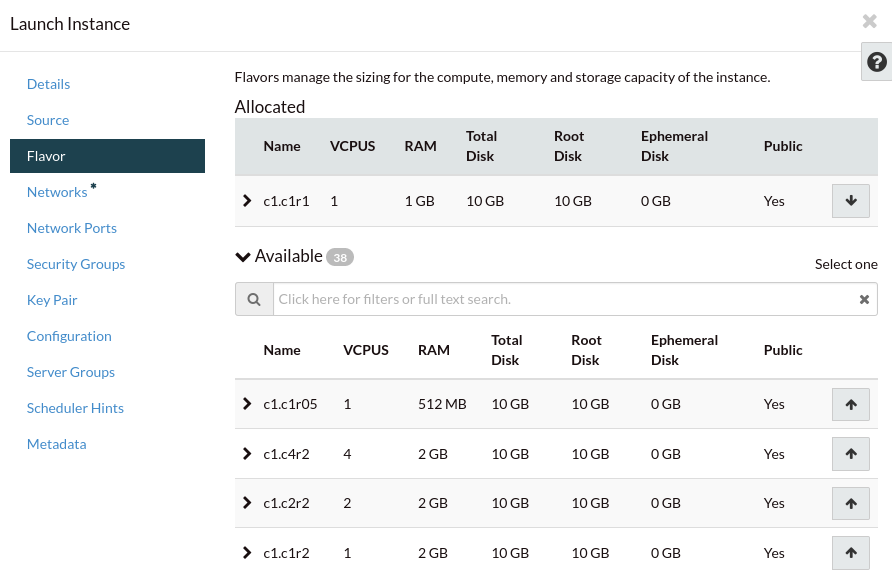
If you are importing an existing virtual machine, for its first boot you
should choose a flavor that provides at least the same amount of CPU and RAM
as the VM had before. Once you confirm the compute instance is booting
appropriately, you can resize it to a smaller flavor if you wish:
Warning
Remember that your VM has been imported exactly as it was before, therefore
there might be some things that may prevent you from connecting to it
remotely (for example: a host base firewall blocking connections). You can
use the console and your existing user credentials to connect to your
compute instance and make adjustments to its configuration as required.