When creating a new instance via the dashboard you are asked to select a
Boot Source. You can choose to use an image provided by Catalyst Cloud,
images uploaded by you, instance snapshots, existing volumes, or volume
snapshots:
Image: Public images are pre-configured operating system images provided
by Catalyst Cloud or our partners. Private images are images you have
uploaded yourself.
InstanceSnapshot: Assuming you have previously created a snapshot of
another compute instance, this option will create a new compute instance that
is a clone of an existing compute instance (at the point the snapshot was
taken).
Volume: Will re-attach an existing volume as the root disk of the new
compute instance. This option assumes that the existing volume is a valid
boot source (i.e.: contains an operating system).
VolumeSnapshot: Assuming you have previously created a snapshot of a
volume, this option will create a new root disk that is a clone of an
existing volume (at the point in time the snapshot was taken).
Compute instances can have their root disk backed by a PersistentVolume or
an EphemeralDisk. The table below outlines the main differences between
these two options:
Root disk type
Life-cycle
Snapshots
Persistent Volume
Will continue to exist
after the compute instance
is deleted, so long the
option delete on terminate
was not selected.
Snapshots will take less
than a second to be
performed and will use
less space.
Copy on Write (CoW) is
used for the snapshot. As
a result, the snapshot
will depend and require
the original volume to
remain available.
Ephemeral Disk
Will be deleted when the
compute instance is deleted.
Will take longer to be
performed and will use
more space.
A complete copy of the
data will be created. As
a result, the snapshot
will be independent and
the original ephemeral
disk can be deleted.
By default the web dashboard will create a PersistentVolume. This is the
recommended option for most use cases, and in doubt, the one that should be
selected.
EphemeralDisk is only recommended for true cloud native applications,
built using the immutable infrastructure principle, or for one-off jobs. If
you choose to use ephemeral storage for an instance it is highly
recommended that you do not shelve your instance. Shelving an ephemeral
instnance will create an image of your instance instead of a snapshot and
this image will not be deleted when you unshelve your instance. Over
time this can result in unecessary images being kept on your project. If
you want to frequently shelve your instances then you should use
PersistentVolumes for them.
For convenience, it is possible to request the compute service to delete the
PersistentVolume used for the root disk when the compute instance is
deleted. To do so, select “Yes” for “Delete Volume on Instance Delete”.
Warning
For production workloads it is not recommended to delete volumes automatically
when compute instances are deleted.
In order to launch an instance from an NVMe volume we need to create a volume
of the right type based on the image that we need to run. Once this is done we
can launch a new instance from that volume.
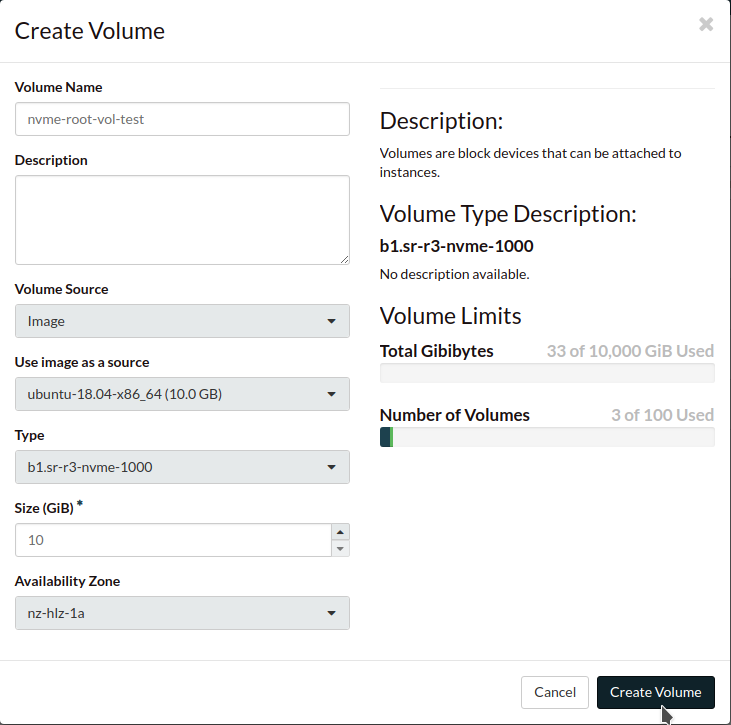
Got into the Volumes screen and select Create Volume and set the following
as explained
VolumeName: something meaningful so it can be easily identified in
subsequent steps.
VolumeSource: needs to be set to Image.
Useimageassource: this option is made visible by the previous choice,
select the OS image that you wish to run.
Type: select one of the NVMe storage tier options from the dropdown.
Here is an example using Ubuntu 18.04 as the image on a b1.sr-r3-nvme-1000
volume.
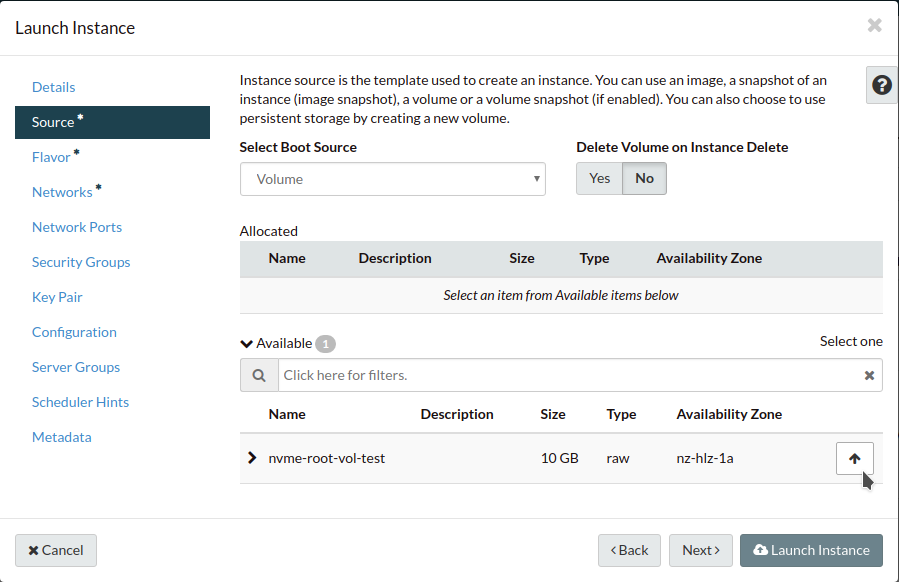
Once the volume has been successfully created we can launch the instance.
Go to the Instances page and select Launch Instance. Populate the Details
section as required.
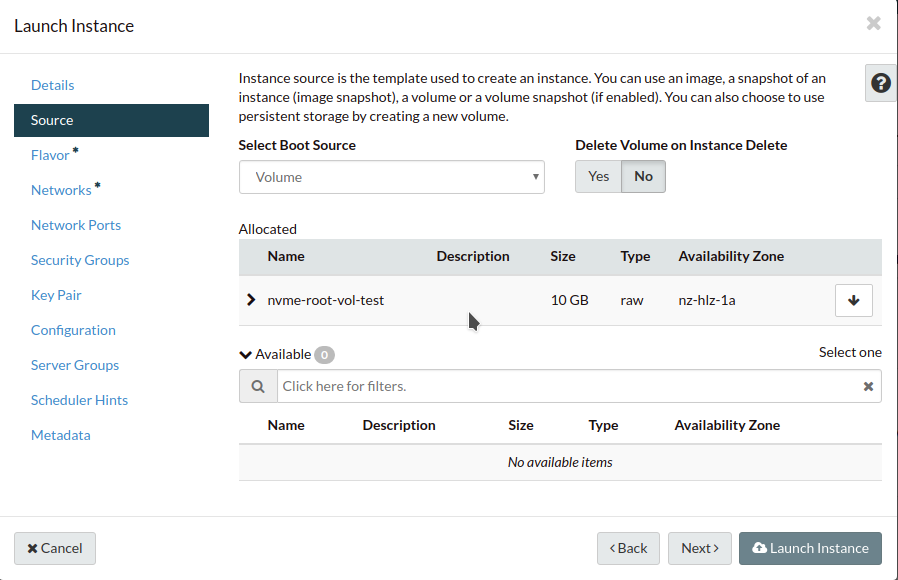
On the Source page set SelectBootSource to Volume, you should now be
able to see the volume you created in the previous step under Available.
Select your volume and ensure it now appears under Allocated like this.
Complete the rest of the Launch Instance dialogue as required and launch the
instance.
The compute instance “flavor” (spelt as the API spells it) defines the
type of compute, and the amount of CPU and RAM allocated to your virtual
servers. The price per hour for a compute instance varies according to
its flavor.
Our flavors are named after the type of compute and amount of CPU and RAM
(and any other significant resources) they provide you, so you don’t need
to consult our documentation to find out their specifications. We
currently provide a number of common combinations of CPU and RAM.
A virtual CPU (vCPU) is a slice of a physical CPU. How these are sliced
depend on the type of compute chosen. In general, one vCPU is mapped to
one hardware thread on the physical core. Some types of compute will
statically allocate these (assuring predictable performance), while
others will timeslice further or dynamically allocate hardware threads
as needed. This is documented in the product page about each type of
virtual server.
RAM is always allocated 1:1 with the physical RAM. We do not
oversubscribe RAM as this severely impacts performance.
Note
Some flavors have specific OS requirements which must be followed
when using those types of servers.
An application called cloud-init is included in all images provided by
Catalyst Cloud. This script is there to assist with instance configuration at
boot time. It communicates with the meta-data agent in the cloud and, for
example, configures the network of your compute instance as defined by you via
our APIs.
Cloud-init is very powerful. It’s a de facto multi-distribution and multi-cloud
way of handling the early initialisation of a cloud instance.
When you launch a compute instance on Catalyst Cloud, you can pass
initialisation configuration to cloud-init via “user-data” (either using the
--user-data parameter of openstackservercreate, or as a post-creation
customisation script via the web dashboard).
In the following sections, we provide examples that illustrate how to perform
common initialisation tasks with cloud-init, using different configuration
formats.
The following assumes that you are familiar with the Heat template and
have installed all required dependencies.
The cloud config format is the simplest way to accomplish initialisation tasks
using the cloud-config syntax. The example below illustrates how to upgrade
all packages on the first boot.
#cloud-config# Run a package upgrade on the first boot
package_upgrade:true
The example below shows cloud-init being used to change various configuration
options during boot time, such as the hostname, locale and timezone.
#cloud-config# On Catalyst Cloud, the default username for access to your instances is:# - CentOS: centos# - CoreOS: core# - Debian: debian# - Ubuntu: ubuntu# - Instances deployed by Heat: ec2-user# You can chose a different username with the "user" parameter as shown below.
user:username
# Set the hostname and FQDN
fqdn:hostname.example.com
manage_etc_hosts:true# Set the timezone to UTC (strongly recommended)
timezone:UTC
# Set the locale
locale:en_US.UTF-8
# Run package update and upgrade on first boot
package_upgrade:true# Mount additional volumes
mounts:
-[/dev/vdb,/mnt,auto]# Install packages
packages:
-git
-sysstat
-htop
-apache2
# Run commands (in order, output displayed on the console)
runcmd:
-echo"Sample command"# Reboot when finished
power_state:
mode:reboot
message:Rebootingtoapplynewsettings
# Save a copy of cloud-init's process output (info & errors) to a logfile
output:{all:'| tee -a /var/log/cloud-init-output.log'}
Cloud init can be used to run scripts written in any language (bash, python,
ruby, perl, …) at boot time. Scripts must begin with #!.
#!/bin/bash# Upgrade all packages
apt-getupdate
apt-get-yupgrade
# Install apache
apt-get-yinstallapache2
The mime multi part archive format allows you to combine multiple cloud-init
formats, files and scripts into a single file.
The example below uses the cloud-config format to install apache and the script
format to overwrite the index.html file of the default website:
For other formats and more detailed information on how to use cloud-init to
initialise your compute instances, please refer to the cloud-init official
documentation.