How to migrate between different volume types
Volumes can be converted to a different type in-place provided they are not
attached to a server, and do not have any existing snapshots. This allows volumes
to be moved to a different storage tier, such as moving from standard storage to
NVMe if additional performance is required.
To get a list of available volume types, use the openstack volume type list
command:
$ openstack volume type list
+--------------------------------------+--------------------+-----------+
| ID                                   | Name               | Is Public |
+--------------------------------------+--------------------+-----------+
| 6b5bd490-98a7-48db-af62-092fbf0bc9f0 | b1.sr-r3-nvme-5000 | True      |
| 3dd4bb01-2cfa-41b1-80e1-9b1877298fc2 | b1.sr-r3-nvme-2500 | True      |
| 08c964fd-a3e7-4c47-b82f-abad010a683e | b1.sr-r3-nvme-1000 | True      |
| fc442ee4-c7b2-4f22-980a-fdac35b4097f | b1.standard        | True      |
+--------------------------------------+--------------------+-----------+
These examples work with a volume called demo-volume-1; substitute this for
the name or ID of the actual volume in question.
First, check that there are no existing snapshots created from the volume:
$ openstack volume snapshot list --volume demo-volume-1 -f yaml
[]
Then check that the volume is not attached to a server:
$ openstack volume show demo-volume-1 -f yaml -c attachments -c status
attachments: []
status: available
If the volume is attached to a server then the server ID it is attached to will
be listed under attachments. Any filesystems in the instance using this
volume will need to be unmounted and then the volume detached from the server
using the openstack server remove volume command.
Once the volume shows status as available, use the following example to
migrate the volume type:
openstack volume set --retype-policy on-demand --type b1.sr-r3-nvme-1000 demo-volume-1
Note that the --retype-policy on-demand option is essential.
The volume may take a few minutes to complete migrating, depending on how much
data has been written to it.
Use the openstack volume show command to check the state:
$ openstack volume show demo-volume-1 -c status -c type
+--------+--------------------+
| Field  | Value              |
+--------+--------------------+
| status | retyping           |
| type   | b1.sr-r3-nvme-1000 |
+--------+--------------------+
Once the volume migration has completed the status will show available and
is ready to be re-attached to a server.
How to grow a volume
So you have been successfully using OpenStack, and now one of your volumes has
started filling up. What is the best, quickest and safest way to grow the
size of your volume?
The block storage service supports the live extension of volumes regardless of
whether that are boot volumes or additional volumes attached to your instance.
Via the CLI
Using the openstack command you can extend a volume by increasing the size
(in GB) using the set command. This example extends the volume called
demo-volume-1 to 40GB in size:
openstack --os-volume-api-version 3.42 volume set --size 40 demo-volume-1
Note that in order for the command to support the live volume extension the
minimum version of 3.42 for the Block Storage API needs to be given as shown
above.
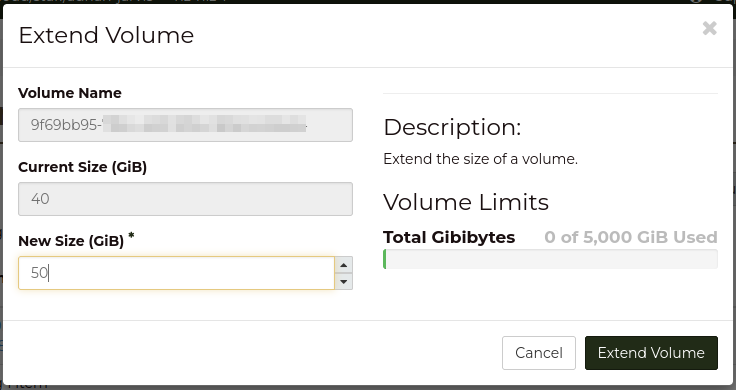
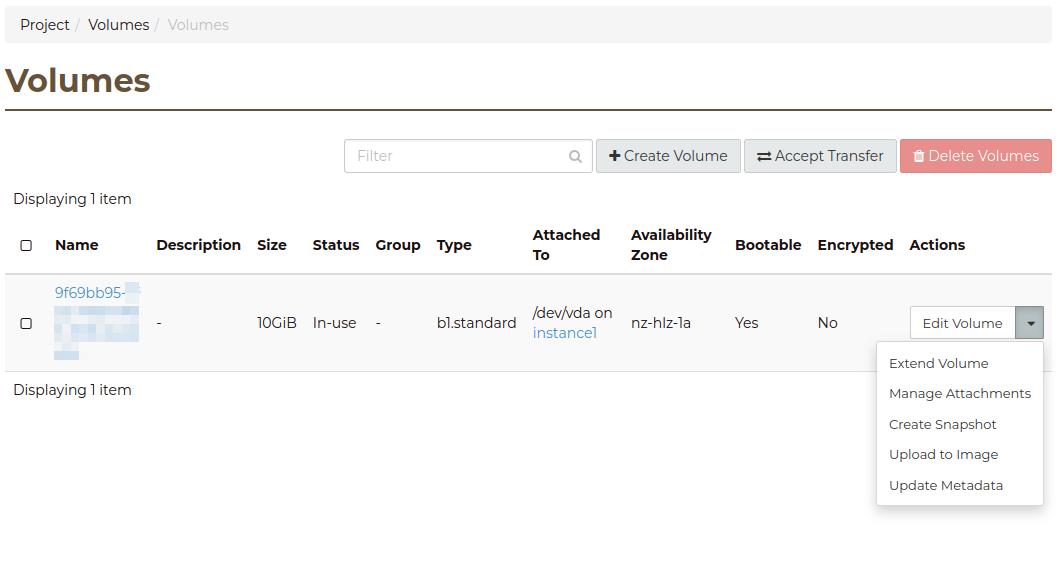
Via the Dashboard
Locate the volume in the Dashboard under the Volumes menu and then select the
Extend Volume action:
In the dialog enter the new size of the volume and click on Extend Volume