On Linux
In a terminal, connect to your instance using SSH with dynamic port forwarding
enabled:
You should leave this SSH session established while using the proxy.
Now, your browser needs to be configured to use this tunnel as a proxy. The
procedure varies per browser and is described below for Firefox and Chrome.
Firefox
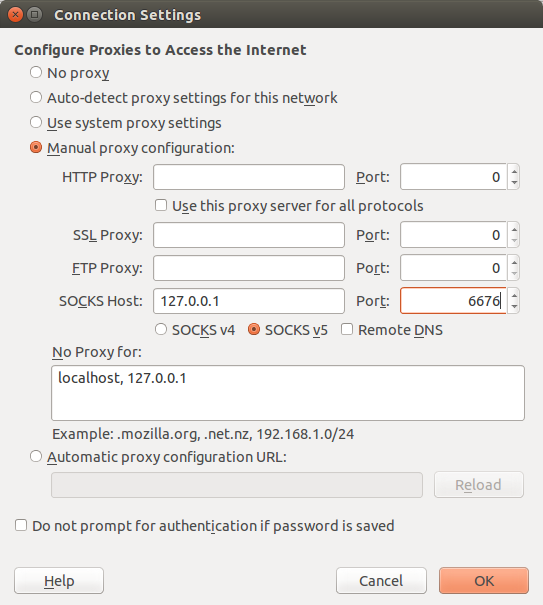
In your browser, change its proxy settings (under Preferences, Advanced,
Network, Settings) to use the cloud-tunnel as a SOCKS proxy, as per the example
below:
Chrome
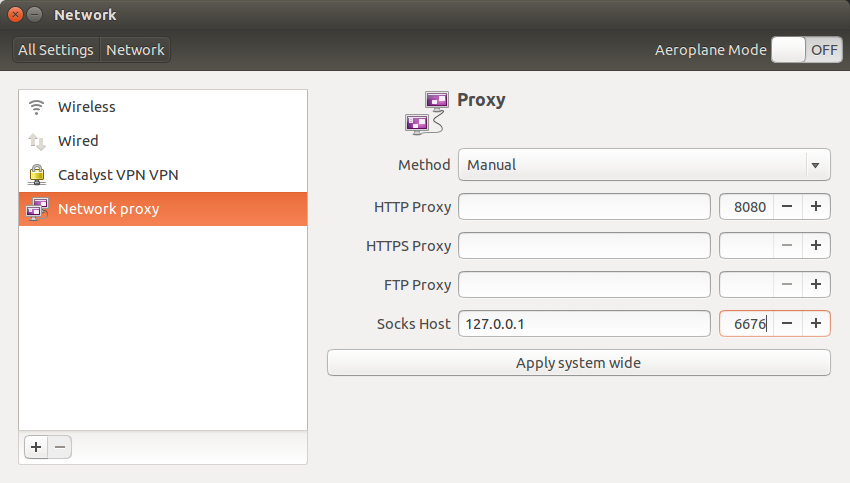
In your browser, enter the URL chrome://settings/search#proxy and click on the
“Change proxy settings…” button. This should open your system network
settings, where you should change the Socks Host (under Network proxy) as
indicated below:
On Mac
In a terminal, connect to your instance using SSH with dynamic port forwarding
enabled:
You should leave this SSH session established while using the proxy. Now,
your browser needs to be configured to use this tunnel as a proxy. The
procedure varies per browser and is described below for Safari, Chrome and
Firefox.
Safari
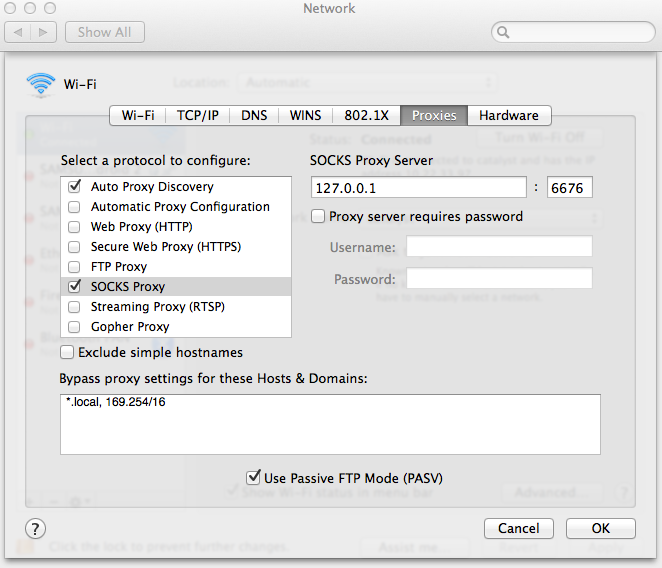
In your network settings (under system settings), change your proxy settings to
use the cloud-tunnel as a SOCKS proxy, as per the example below:
Chrome
In your browser, enter the URL chrome://settings/search#proxy and click on the
“Change proxy settings…” button. This should open your system network
settings, where you should change the Socks Proxy (under Proxies) as indicated
on the previous Safari example.
Firefox
In your browser, change its proxy settings (under Preferences, Advanced,
Network, Settings) to use the cloud-tunnel as a SOCKS proxy, as per the example
below:

On Windows
In order to establish a SSH connection with your cloud tunnel you will need an
SSH client. If you do not have one, you can download and install PuTTY from:
https://the.earth.li/~sgtatham/putty/latest/w64/putty.exe
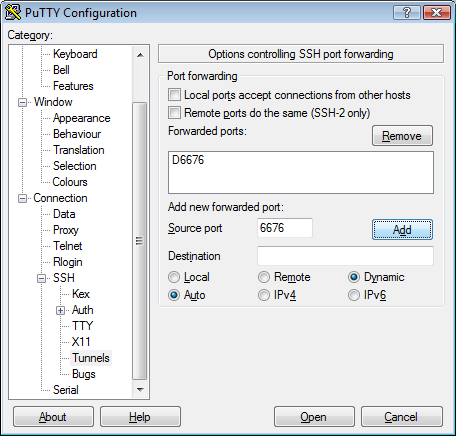
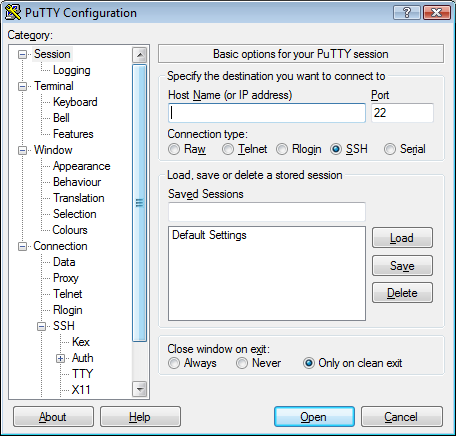
After installing PuTTY, open it and connect to your cloud tunnel instance. On
the Category list, go to Connection, SSH and Tunnels. For the destination
source port, enter 6676 and select Dynamic and then click on “Add”, as
indicated on the image below.
On the Category list, go back to session and enter the IP address of your cloud
tunnel instance.
You should leave this SSH session established while using the proxy.
Now, your browser needs to be configured to use this tunnel as a proxy. The
procedure varies per browser and is described below for Internet Explorer,
Chrome and Firefox.
Internet Explorer
On the configuration menu, open “Internet options”.
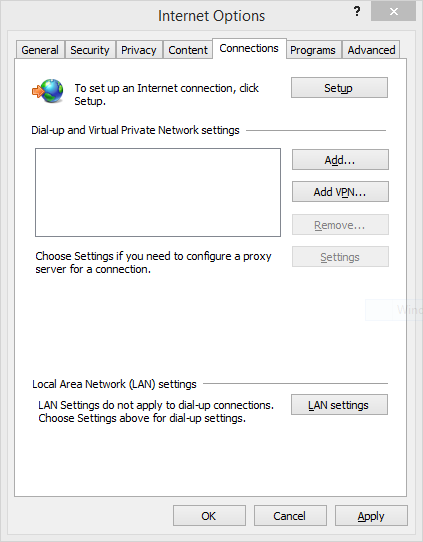
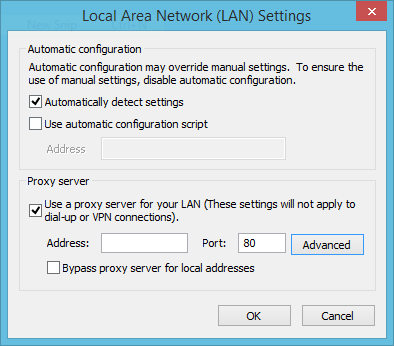
On the connections tab open your “LAN settings” and click on “Advanced”.
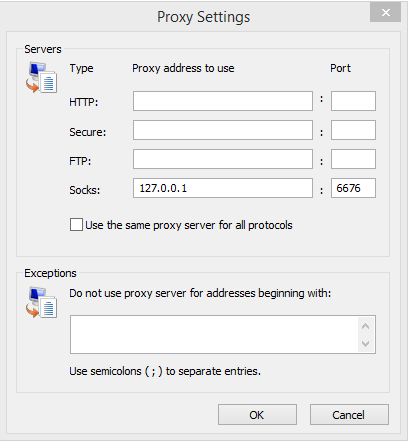
On the proxy settings screen, configure the socks proxy with your local host
(127.0.0.1) and the port used for the SSH tunnel (6676) as indicated below:
Chrome
In your browser, enter the URL chrome://settings/search#proxy and click on the
“Change proxy settings…” button. This should open your system Internet
options, where you can configure a SOCKS proxy as explained previously
in the Internet Explorer example.
Firefox
In your browser, change its proxy settings (under Options, Advanced, Network,
Settings) to use the cloud-tunnel as a SOCKS proxy, as per the example below:


