Source an openstack RC file
When no configuration arguments are passed, the OpenStack client tools will try
to obtain their configuration from environment variables. To help you define
these variables, the cloud dashboard allows you to download an OpenStack RC
file from which you can easily source the required configuration.
To download an OpenStack RC file from the dashboard:
Log in to your project on the dashboard and select your preferred region.
From the left hand menu select “API Access” and click on
“Download OpenStack RC File”. Save the “OpenStack RC for Linux/macOS” file
on to the host where the client tools are going to be used from.
Source the configuration from the OpenStack RC file:
source projectname-openrc.sh
When prompted for a password, enter the password of the user who downloaded
the file. Note that your password is not displayed on the screen as you type
it in.
Warning
You should never type in your password on the command line (or pass it as
an argument to the client tools), because the password will be stored in
plain text in the shell history file. This is unsafe and could allow a
potential attacker to compromise your credentials.
You can confirm the configuration works by running a simple command, such as
openstack network list and ensuring it returns no errors.
Note
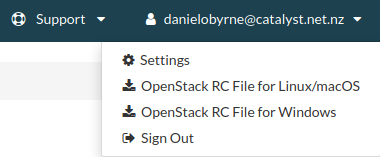
You are also able to download the OpenStack RC file from the top-right
corner where your login details are display as shown below:
Difference between OpenRC for Linux/macOS and for Windows
You will notice that when you go to download the OpenRC file from the
dashboard there are 2 version available. One that is for Linux and Mac based
systems, and one that is for Windows. The reason for this is because Windows
Powershell works differently than the Linux and Mac equivalent.
When authenticating with the Linux/macOS open RC, you need to supply a password
and MFA if you have it. If not, then you hit enter to
continue and you are issued a token for authentication. This token lasts up to
12 hours before you need to authenticate your details again. Powershell, does
not work with this functionality and as such, if you do not have MFA then you
need to authenticate only with your password using the --NoToken flag.
This is discussed more in the Setting up the command line environment on Windows section.
This means that for Windows users authenticating without MFA, you are storing
your password in your command line environment. This is not as secure as using
a token, but this does mean that you will not have to re-authenticate because
of an expired token.